When I was 12, my dad let me hold his old steel claw hammer for the first time to help hang a shelf in our garage. I ended up bending two nails, denting the drywall, and getting a blister on my palm so bad I couldn’t hold a fork that night. Back then, I thought a hammer was just… a hammer—something heavy enough to push a nail into wood. But over the 15 years I’ve been working as a hammer supplier, I’ve watched beginners and even seasoned construction pros mess this up daily, and it always makes me shake my head. Driving a nail isn’t about brute force. It’s about balance, technique, and choosing the right tool for the job. If you’re here because you’ve bent a nail, missed the wood entirely, or left divots that turned a DIY project into a headache, this guide’s for you. Hammer
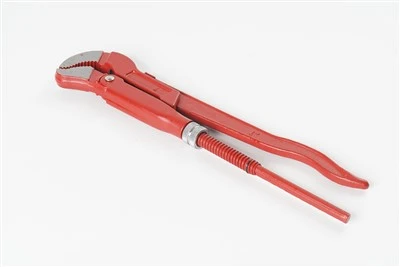
First, let’s talk about picking the right hammer. This is where so many people go wrong, myself included when I was that 12-year-old with dad’s too-heavy claw hammer. Not all hammers are the same, and using the wrong one turns every nail drive into a fight. For general DIY—hanging frames, building a small bookshelf, securing baseboards—you want a 16-ounce curved claw hammer. That’s the sweet spot for most residential jobs: light enough to swing accurately, heavy enough to sink a 2 ½-inch nail without putting your back into it. If you’re working on framing, you’ll want a 20- to 22-ounce framing hammer—heavier head, longer handle, designed for driving 3 ½-inch or longer nails into thick lumber. Steer clear of ball-peen hammers for this, by the way; those are for metalworking, with a rounded end for shaping metal, not a flat strike face for nails. And always check the handle. Fiberglass handles are durable, absorb vibration, and won’t splinter if you drop the hammer, which is why most pro-grade hammers use them these days. Wood handles have a nice feel, but they can crack if they take a hard hit, so they’re better for occasional use. When you hold the hammer, your grip should feel natural—not so tight you’re squeezing the life out of it, not so loose it’s about to slip.
Next, prep the nail and the work surface. I can’t tell you how many times I’ve seen someone jam a nail into a piece of plywood without making a pilot hole, only to split the wood. That’s a rookie mistake, and it’s totally preventable. For thin lumber—like ¼-inch plywood or 1-inch pine—drill a tiny pilot hole that’s about 70% the diameter of your nail shank before you start. That reduces friction and prevents splitting, especially near the edge of a board. Once the pilot hole is done, hold the nail with your thumb and index finger, just below the head. Don’t hold it at the very tip—you’ll get your fingers smashed, trust me. Align the nail dead straight with the work surface. It should be 90 degrees, no angle, because even a slight tilt will make the nail bend mid-drive. Tap the head of the nail gently once or twice with the hammer to set it in place. That’s called “starting the nail,” and it keeps it from sliding around while you adjust your grip. If you skip this step, the nail will slip, and you’ll either hit your finger or leave a tiny mark where the nail dragged across the wood.
Now for the actual swing—this is the part that separates people who get nails driven in cleanly in two minutes from people who spend an hour fighting a single nail. Let’s break this down step by step. First, your stance: stand with your feet shoulder-width apart, one foot slightly forward of the other, for balance. Keep your elbows close to your body at the start—no flailing your arms like a windmill, that’s how you miss. Start with the hammer back near your shoulder, not way behind your head. When you swing, you’re not using your arm; you’re using your whole body to generate force. Rotate your torso as you swing, transfer your weight from your back foot to your front foot as you hit the nail. That’s where most of the power comes from, not how hard you can flex your bicep. The strike itself should be a short, controlled motion—no full-swing swings for small nails. For example, when you’re still setting the nail (driving it just a little below the surface to finish aligning), use tiny, light taps. Once the nail is set and straight, you can increase the force, but keep the motion smooth. Aim for the center of the nail head, every single time. If you hit the edge, the nail will bend, and you’ll have to pull it out with the claw of your hammer, which is extra work. I see this all the time on job sites: a framer will miss the nail head once, get frustrated, and swing harder, hitting the wood, leaving a divot, and having to patch it later. Slow down, aim, and be intentional.
Wait, what if you miss the nail entirely? Or bend it? Don’t panic. If the nail is only slightly bent, you can usually pull it straight with the claw of your hammer—just hook the claw under the bent part, grip the hammer handle near the head for leverage, and pull it out gently. If it’s broken off, you’ll need to remove the remaining piece with a nail set or pliers, then start fresh. For divots from missed strikes, fill them with wood filler once the project is done, sand them smooth, and no one will ever know. The best way to avoid this is practice. I still mess up occasionally, even after 15 years in this business. Last month, I was hanging a mirror in my kitchen and hit the wall stud wrong, leaving a tiny divot above the frame. No big deal—just filler and paint, and it’s gone.
Pro tips from the trade that most beginners don’t know: First, wear safety glasses. It only takes one stray nail chip to hit your eye and ruin your day. I learned this early on when a flying nail fragment nicked my eyebrow, and I had to get three stitches on a Saturday afternoon. Second, if you’re working on a slippery surface, or a very soft piece of wood, you can place a small piece of masking tape over the spot where you’re driving the nail. The tape holds the nail in place while you start it, and it prevents the wood from splitting even if the nail does slip a little. Third, when you’re driving a nail near the end of a board, leave at least 1 ½ inches of space from the edge to the hole. That gives the wood enough strength to hold the nail without splitting—any closer, and you’re almost guaranteed to crack the board. Fourth, for very long nails (like 4-inch or 5-inch framing nails), you might want to clamp the board to a sawhorse before driving. It stops the wood from moving, so the nail goes straight, no bending.
Let me also talk about the difference between solid steel heads and forged heads, because this is something that matters more than you think. A lot of cheap hammers at big-box stores have heads that are stamped from thin steel—they’ll dent, chip, or even fall off the handle after a few months of use. Forged heads, on the other hand, are heated and hammered into shape, making them much tougher and more durable. That’s why we only supply forged-head hammers here—they last longer, deliver a cleaner strike, and reduce vibration so you don’t get hand fatigue after a long day of work. We’ve had customers tell us our hammers have lasted them 10 years of daily use, and that’s the kind of quality you can’t get from a $10 hammer.
At the end of the day, driving a nail is a simple task, but it’s one that comes with small details that make all the difference between a project that looks professional and one that looks like a beginner’s first try. It’s not about how much force you can put into a swing—it’s about choosing the right tool, preparing your materials, and moving with intention. If you’ve ever struggled with a nail, or are shopping for a reliable hammer for your next project, we’re here to help. Whether you’re a DIYer working on a weekend home project or a contractor outfitting a job site, we can connect you with the right hammer for your needs, answer any questions you have about technique or tool selection, and help you get the job done right. If you’re ready to source quality hammers for your work, reach out to our team to discuss your requirements. We don’t cut corners on quality, and we’re dedicated to helping professionals and hobbyists alike get results that last.
Hand Saw References
- National Association of Home Builders. (2021). Residential Construction Best Practices for Fastening and Framing. NAHB Press.
- Occupational Safety and Health Administration. (2019). Hand and Power Tool Safety Guidelines. OSHA Publication 3151.
- American Wood Council. (2020). Wood Fastening and Installation Guide. American Wood Council.
Shandong Shining Import & Export Co., Ltd.
Founded in 1986, We are one of the most professional hammer manufacturers in China. With abundant experience, we warmly welcome you to buy advanced hammer for sale here here from our factory. If you have any enquiry about customized service, please feel free to email us.
Address: No.06073, Unit A, Building 2, Yihe Three Road, Comprehesive Bonded Zone, Linyi City, Shandong Province, China
E-mail: info@shiningtool.com
WebSite: https://www.shiningtool.com/
